Showing posts with label Elastix. Show all posts

Monday, 4 April 2016

Elastix Voicemail Problems

An interesting problem reported by a user running elastix today that i've just finished dealing with. The users had calls from external customers advising that they were unable to leave a voicemail because the inbox was full.

Upon further investigation i discovered they were indeed correct. The system was not allowing voicemails to be resolved.

Resolution


To resolve this problem i renamed the voicemail users folder under /var/spool/asterisk/voicemail/default, after doing this i disabled and then re-enabled the extensions voicemail setup and voila. All done and dusted.

I have so far not got to the bottom of the cause but this is nice quick fix to get your users back up and running and giving you some leeway to get to the bottom of it. 

Sunday, 3 April 2016

Elastix Creating A SIP Trunk

So you've built your Elastix system and you're super excited but you need to get the traffic into the system, you now need to start thinking about trunks specifically SIP in this instance.

First up you need to head to the Trunks section of Elastix, then into Add SIP trunk.
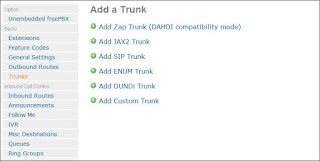
Add a Trunk Menu


Add SIP Trunk Options


Next up you need to go to enter your peer details, sadly all providers will have different options and this will be the most difficult part of the process. In my experience the key is to go to your provider and enquire firstly the documentation before selecting a company to go with. Normally you will gather the details from a quick help section on the site but i would advise checking beforehand to make this process quicker, another point to remember when looking for this is that they may refer to adding a trunk with asterisk and you can then copy the setup from there when creating a SIP trunk.
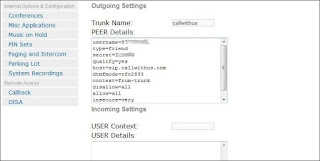
Example Outgoing Settings


After you've entered your details for creating a sip trunk you need to hit submit at the bottom of the page, once you've completed this you'll see at the top of the screen a bar along the top asking to "Apply Configuration Changes Here". Once you've hit this your configuration will be live.
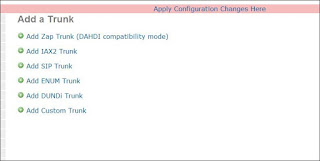
Apply Configuration Changes

Thursday, 27 March 2014

Elastix - Asterisk Reset Admin Password

So if like me you've ended up taking over random Elastix installs with no proper documentation then you may discover that you have no idea what the admin passwords are for web interface. If you don't have the root password either you're kinda screwed but below is a nifty little command to get you back onto the frontend web interface of elastix.

/usr/bin/sqlite3 /var/www/db/acl.db “UPDATE acl_user SET md5_password = ‘`echo -n newPassword|md5sum|cut -d ‘ ‘ -f 1`’ WHERE name = ‘admin’”
* Just replace newPassword with the password you want it to be.

Monday, 24 March 2014

Elastix - Setup Call Divert

Recently had an enquiry from a customer about wanting to divert to mobile when he left the office and be able to take it off when back.

Quite a simple one to run through and the details are below.

If you are working at another extension or away from the office here's how you can setup your calls to be forwarded directly to an extension or external phone.

To activate:Dial * 72   
1. Listen for voice prompt.
2. Dial the desired telephone number you wish your calls forward to followed by #.
3. Listen for confirmation.
Call Forwarding is established.

To deactivate:
1. Press *73.
2. Listen for confirmation.

Don't forget with external numbers such as your mobile that these need to have a 9 infront of them as is the case with most phone system setups.

Tuesday, 29 October 2013

Elastix - Setup Out Of Hours - With Time Conditions and Groups

I have a requirement to get an Out Of Hours Message system setup.

Here are the steps i am going through to achieve this.

Step 1 - Create a time group, specifying


Step 2 - Create a Time condition - In my example called Out Of Hours


Step 3 - So know we have out time group and we have specified what to do when the time matches and doesn't match. From here you just need to assocatiate the time condition with the inbound route you want to add this time condition too. The option shown below is found at the bottom of the inbound route screen.

 Don't forget to submit your changes and apply configuration on your elastix console before you test! Hope you find this and it is clear and concise enough for anyone to make use of. If you have any questions or any other ways of doing it let me know.